Setting up Shipping Zones
A shipping zone is a geographic region where a certain set of shipping methods and rates apply. You can add different tables of rates to each zone to charge different customers different amounts.
Add Table Rates to a zone
To use Table Rate Shipping, it must be added to a Shipping Zone.
1/ Go to: WooCommerce > Settings > Shipping.
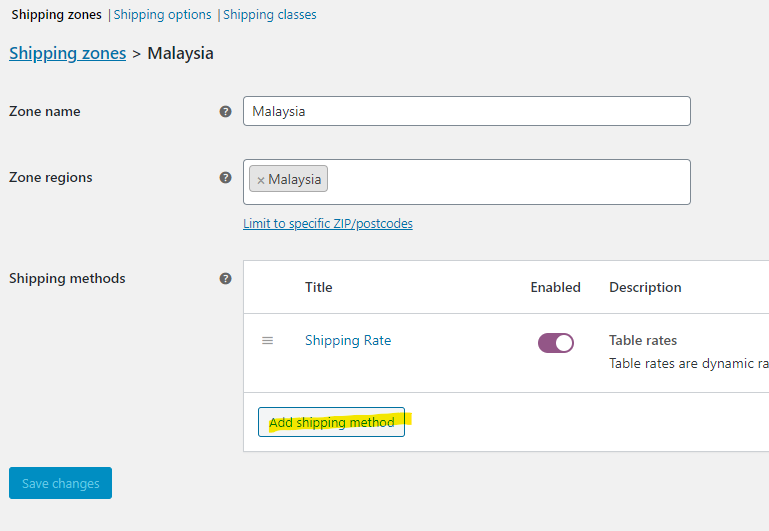
2/ Select edit below the name of the Shipping Zone you wish to add rates for.

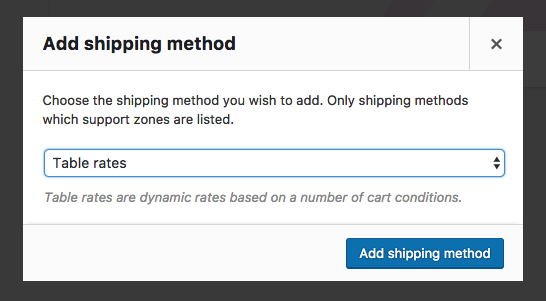
3/ Select Add shipping method bottom left of the table with shipping methods. This opens a modal window.
4/ Select Table Rate from the dropdown, and Add shipping method.
5/ Save changes.
Setting up a Table Rate
After the shipping method has been added to the shipping zone, settings for Table Rate need to be applied.
1/ If you can’t see the word “Table Rate” yet, Select Edit below the shipping zone that contains the Table Rate that you want to edit. This takes you to a different screen.

2/ Select Edit for Table Rate.

This opens a Settings screen for you to configure.
3/ Enter your preferences for this shipping method.

- Method Title — Name of shipping method displayed to customers. For example, 1st Class and 2nd Class, if there are two methods for a zone.
- Tax Status — Define whether or not tax is applied to the shipping amount.
- Tax included in shipping costs — Define whether the shipping costs defined in the table are inclusive or exclusive of taxes.
- Handling Fee — Additional fee. Can be a fixed amount (2.50) or leave blank for no handling fee.
- Maximum Shipping Cost — Can assign a maximum cost to a method. For example, if the total calculated is greater than the maximum cost, the price is decreased to maximum cost amount.
4/ Enter Rates – Calculation Type.
Rate Settings
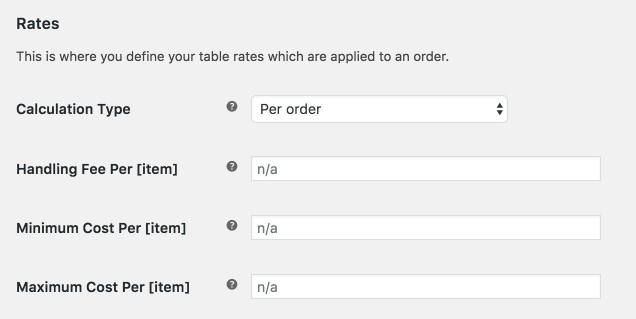
Calculation Type — Tells plugin how to calculate shipping on customer’s cart. Choices are:
- Per order – calculates shipping for the entire cart. If there are varying shipping classes in the customer’s cart, the class with the highest priority will be used. These can be set in the table that appears underneath the rate table when per order is selected.
- Calculated rates per item – calculates the rate by checking each item in the customer’s basket against the table of rates.
- Calculated rates per line – looks at each line in the basket and checks that against the table. Multiple of the same item are on the same line, so the customer will only be charged once for multiples of the same item.
- Calculated rates per shipping class – each shipping class in your basket is totaled and offered at a final rate.
===============================================================================
SET FREE SHIPPING FOR MIN SPEND

Above is an example,
The one circled in red is Flat Rate for purchase of RM0 - RM300
1. Please Condition: Price
2. Key in the min and max amount that is get RM8 shipping fee (in this case purchase in the range of RM0 - RM300 will get RM8 shipping fee)
3. Row Cost Column: Key in the Flat rate shipping which is 8 that represents RM8
4. Label Coulmn: Key in the Label. This label will be shown on the checkout page after customer has filled in the shipment address.
Here is a sneek pic of the shipping result on checkout page
Flat Rate RM8 (purchase of RM0- RM300)

The one circled in blue is Free Shipping setting for purchase of RM300 and above
5. Key in the min spend limit to get Free Shipping
6. Row Cost Column: Key in the shipping rate as 0 that represents RM0(Free shipping)
7. Label Column: Key in the Label as "Free Shipping". This label will be shown on the checkout page after customer has filled in the shipment address.
Here is a sneek pic of the shipping result on checkout page
Free Shipping for purchase of RM300 and above

Was this article helpful?
That’s Great!
Thank you for your feedback
Sorry! We couldn't be helpful
Thank you for your feedback
Feedback sent
We appreciate your effort and will try to fix the article