How to add a product in WooCommerce
After installing WooCommerce, open your WordPress dashboard and go to WooCommerce > Products. Then, click the Create Product button to create your first product.
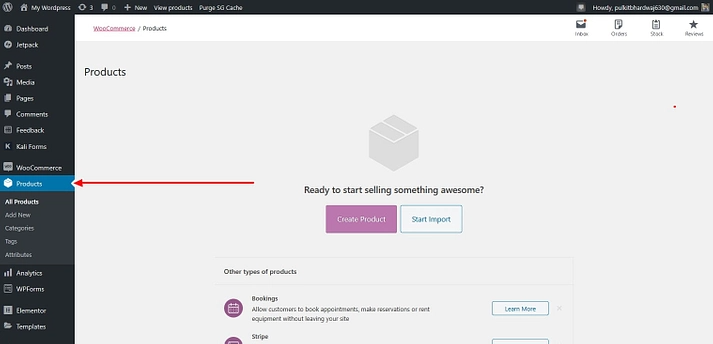
This should launch the WordPress editor that you’re already familiar with…but with some new additions.
Here’s how to configure everything…
1. Add product title and description
Enter the name of the product in the title section. Next, complete the description for your product. You’d want the description (more specifically, long description) to explain the advantages of a product. You can even use bullet points to improve the readability of this section.

Not sure what to write? Here’s a product description template 
When writing the title and description, make sure to optimize them for organic keywords. If you want to use semantic keywords on the product page, add it in the long description.
2. Choose product type
Depending on what you’re selling, WooCommerce lets you use different product types. You can choose from four core product types:
- Simple product – It is the default. This type of product is common among WoCommerce store owners. For instance, a one-size-fits-all hat.
- Grouped product – A grouped product is usually for combining simple products — for instance, a pack of five t-shirts.
- External/Affiliate product – If you have a dropshipping business, or an affiliate based store, you can use this option to link the “Add to Cart” button to an external page.
- Variable product – A product that offers multiple variations like colors, sizes, etc. For example, a t-shirt where shoppers can choose between “Small”, “Medium”, “Large”, etc.
You also get two additional options to modify those four core product types:
- Virtual – This option is for those who are selling an online digital product that doesn’t require a shipment.
- Downloadable – You can enable this if there’s a downloadable file associated with the product. For example, an eBook or audio file.
To make this choice, you can use the drop-down and checkboxes in the Product data box, which appears just below the WordPress editor where you added the product description:

For the rest of this tutorial, we’ll use a Simple product. The process is generally the same for other product types – you’ll just get a few additional options.
3. Fill out the product data meta box
Once you’ve selected your product type, you’ll need to fill out the rest of the details in the Product data box. You can use the tabs on the left to navigate between different sections.
General tab
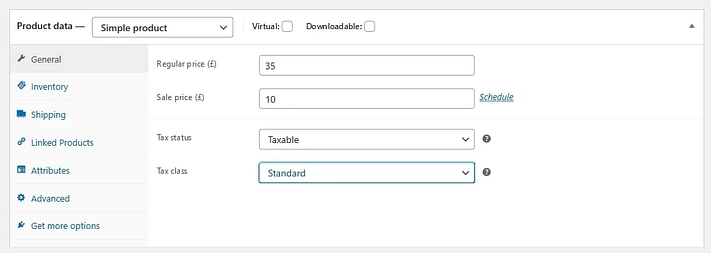
Under the General tab, enter the price for regular and sale price.
The sale price is for when you decide to run a discount campaign. Otherwise, shoppers will see the regular price.
Below that, select the tax status – whether or not the product is taxable. If yes, select the tax class.
Inventory tab

WordPress is not only great for starting a dropshipping store but also to create an inventory based eCommerce store; all thanks to WooCommerce.
The Inventory tab helps you effectively manage stock. The SKU, stock status, and other options will be there by default. But if you don’t see it, make sure to enable the stock management option by going to WooCommerce > Settings > Products > Inventory.
Here, SKU is a unique identification number available on every product or service. This keeps the products distinctive and simplifies inventory management. You can either assign the SKU manually or use a WordPress plugin to generate unique SKUs.
You will notice an option saying “stock management on product level”. If you haven’t checked it, then you will have to update the stock manually. However, if you check the box, the WooCommerce stock management system will automatically show the product.

- Enter the number of pieces available in the stock quantity, and it will auto-update.
- Allow back orders if the product is being manufactured and will be available soon.
- The low stock threshold will notify you when the product’s stock goes below the threshold.
Shipping tab

In the Shipping tab, you can control important details about a physical product for shipping.
Enter the weight of the product and dimensions.
There’s an option called shipping class. Shipping rates vary due to weight, service type, and other reasons. The shipping class group the products based on weight limits.
For instance, in a shipping class, you can group products weighing 15 ounces together and use a particular shipment service. Then you can arrange heavier ones and ship them with priority mail, etc.
Was this article helpful?
That’s Great!
Thank you for your feedback
Sorry! We couldn't be helpful
Thank you for your feedback
Feedback sent
We appreciate your effort and will try to fix the article